So, one day while I was meandering around on the internets, specifically the Facebook Group GWM Cannon Owners of New Zealand, somebody mentioned they’d like extra reversing lights.
This idea stuck in my mind for a while, until I decided, bugger it, let’s install more lights 💡
And while I was shopping, I accidentally came home with some Bullbars 🚘, and some decals 🌈.
The Reversing Lights
The concept was pretty simple, I could see a space on either side of my rear number plate that would easily fit a 100mm flush mount spotlight.
So, the searching began 🔎
Where else but, AliExpress
When the lights arrived, it was time to piece together a simple wiring loom to power them.
Wiring Diagram
A few people have mentioned that they don’t understand what a “switched relay” circuit is.
So, I thought I’d take the time to draw out the diagram, and explain a little.
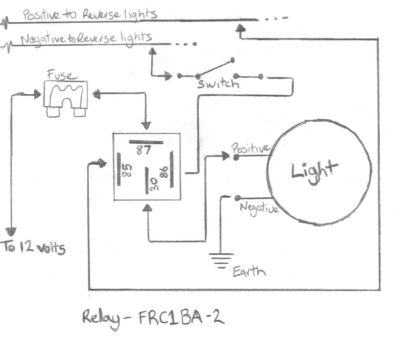
The idea goes like this:
You take 12v from a good source (like the battery); you take 12v from something you want to use as an “activator” (in this case the reverse lights), and you wire in a manual override switch (just in case, come Warrant of Fitness time).
Sounds simple enough.
The main power supply is switched on by the activation of some other power source.
i.e. When the reverse lights turn on, also turn the power on to the additional reverse lights.
It is exactly the same circuit that I used with my Light Bar
Once again, just like in the Light Bar install, I run the cabling up the rubber gromet behind the back seat.
I run a cable up to my glove box for a switch, and the main 12v I took from my existing fused 12v that powers my Sub woofers
The existing Reverse Lights
Now let’s remove the tail light.
There are 4 bolts to remove:
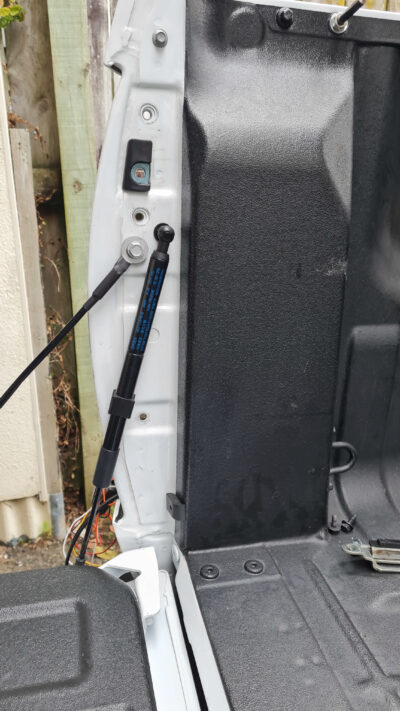
And to remove the tail light assembly you have to pull the light away from the side of the truck (i.e. not backwards, but lever out to the side).
You’ll be confronted with the following plug:
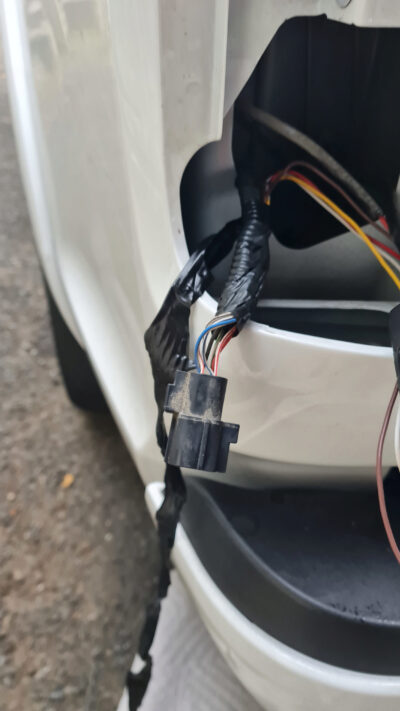
Now I had a tow bar, and associated wiring installed before I bought the truck, so I already had the trailer loom wired into the tail light (which helped).
The two important wires for this job are:
- Blue/Yellow.
- Black.
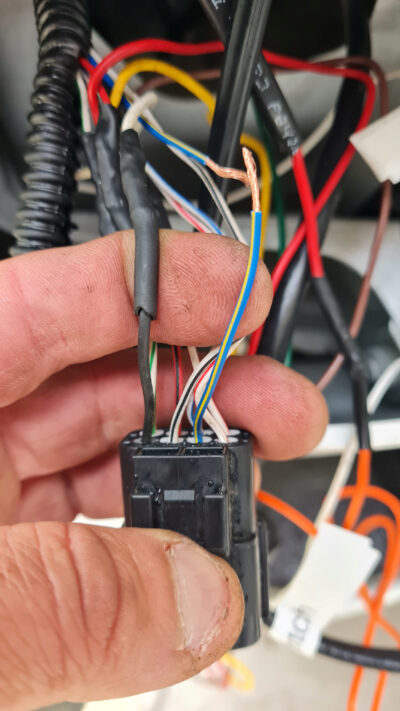
In the wiring diagram above these are the positive and negative to the existing reverse lights.
Now get to work routing cables etc etc .. that’ll take a while 🤣
The Result
So, now when the switch is turned on, and we select reverse, the additional lights power on as well 🤩
#WINNING
The Bullbars
Yeah, so, well, um …. I’m in Keppler’s one day, doing some IT work for them, and at the same time gas bagging with Darryl the service manager about Bullbars.
I say “look, if I can pay them off, I’ll buy some 😬.
He says he’ll order some, and we can work it out when they arrive.
30 minutes later I’m at another Keppler site/workshop, and low and behold, there are some brand new Bullbars sitting on the floor waiting to be bought!
One thing leads to another, and I have them in the back of my truck, and I’m taking them home 🤭.
The install is pretty easy; basically:
- Remove two bolts from the front.
- Install a mounting bracket on either side using two bolt holes behind each wheel, and the bolt holes you just exposed.
- Slide the Bullbars over the mounting brackets and bolt in place.
Easy as
They look bad ass!
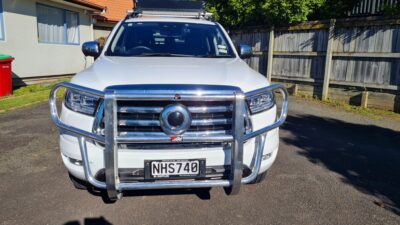
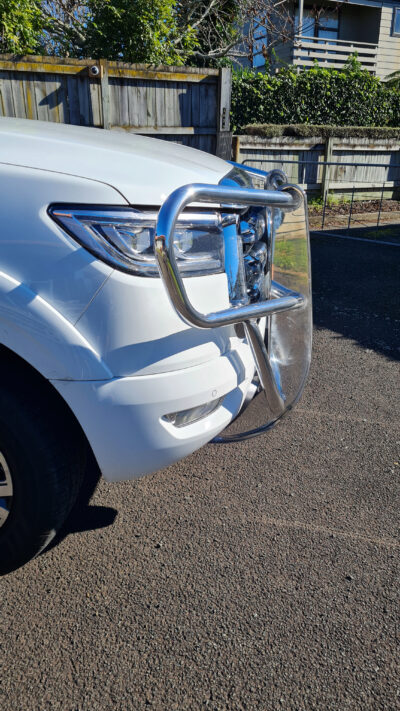
Hit me up if you need help with this, I can talk you through it.
The Decals
I found some decals online (in Australia), that I thought looked pretty cool.
I also noticed that the images they were using had a Chinese watermark ( 长城炮车 ).
Interesting ……
A little while later, and I’ve discovered a Chinese online store I didn’t know existed: Taobao
Firstly, it’s all in Chinese, so get friendly with Google Translate.
Secondly, it has a reputation for being dodgy, so buy at your own risk.
But two weeks later, and my Decals turn up!
I reckon they look sweet too !
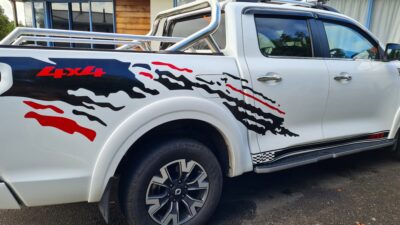
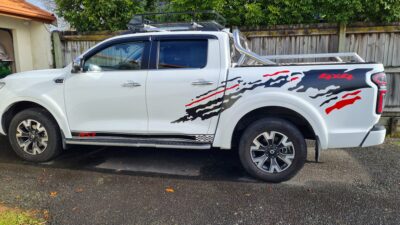
There was some discussion with my friends about whether I should put on the RSR bit.
Obviously, I decided to.
Matt had the best guess at what RSR stands for:
Raff So Roud

8 Comments